The 5 Best Yoga Poses for Back Pain

Many people struggle with back pain. Whether it's work-related or from a chronic condition, back pain can consume your life and make it difficult to complete everyday activities. The good news is that there is a natural way to help relieve back pain and increase mobility. According to the Mayo Clinic, the ancient practice of yoga can help release tension, relax taut muscles, and reduce reliance on pain medication.
If you're considering adding yoga as an exercise routine and have back pain or a back injury, talk to your doctor about the best way to incorporate yoga to treat back pain. According to the Annals of Internal Medicine's July 2017 research, yoga can help your body manage pain better by improving neural function while strengthening your back, stretching muscles, and aligning your spine.
To try this natural relief method, check out these five best yoga poses for back pain.
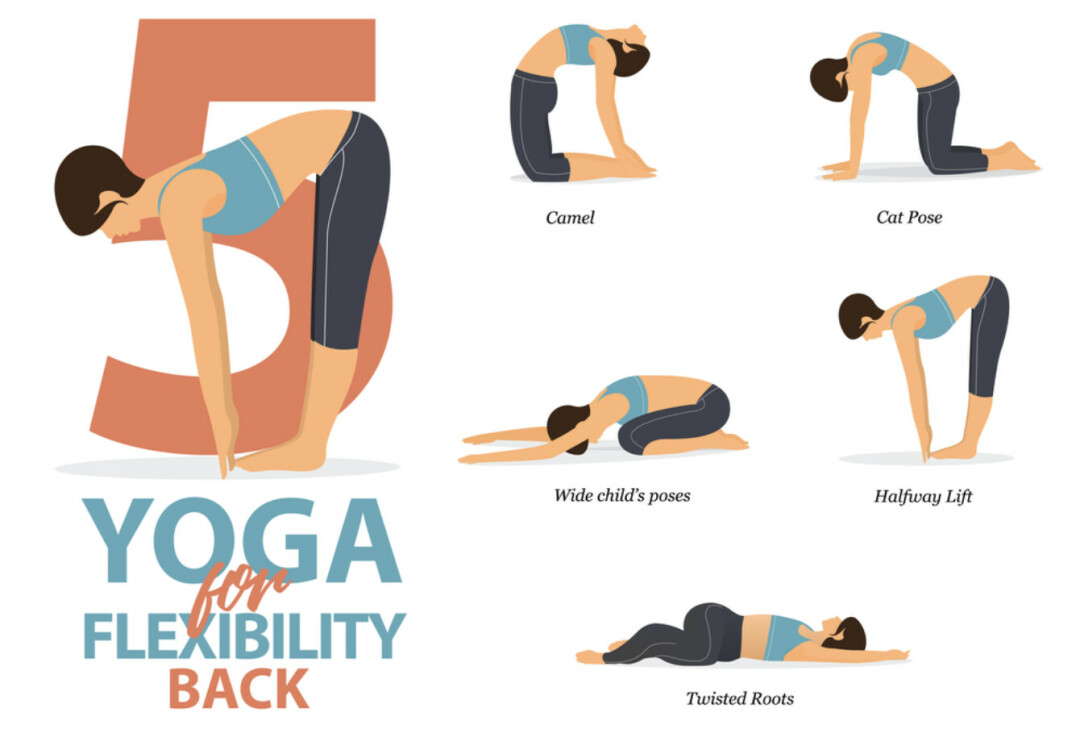
1. Cat/Cow Pose
This pose is perfect for a sore, aching back since it helps warm up and loosen tight back muscles that can cause pain.
Start by getting down on your hands and knees, then transition into Cat pose by slowly arching your spine like a cat. Hold this pose for several seconds. Then move into Cow pose by letting your stomach drop while pushing your shoulders back and raising your head.
Repeat 10 times in a smooth flow from Cat to Cow and Cow to Cat. Repeat this yoga flow as needed until your muscles relax.
2. Child's Pose
This pose can look like you're not doing anything, but Child's Pose takes us back to childhood basics when we moved naturally. So while Child's Pose looks restful, it creates an active stretch along your neck, shoulders, and back.
Begin the pose by getting down on all fours and stretching your arms over your head. Now, sit back into the pose so that your bottom rests close to your heels without touching. Keep this pose and breathe slowly and evenly 5-10 times. You can repeat this soothing stretching movement as many times as needed.
3. Downward-Facing Dog
Almost everyone has heard about this famous yoga pose. It targets the large muscles that make up your lower back and spine and supports standing and lifting muscles.
To do this pose, begin on your hands and knees. Place your hands flat on the floor just ahead of your shoulders. Lift up and back, raising your knees from the mat, and push your tailbone towards the ceiling.
You can carefully lower your heels toward the floor if you want to add a gentle hamstring stretch. Then, hold Downward-Facing Dog Pose for 5-10 breathes and repeat the sequence 5-7 times.
4. Pigeon Pose
Pigeon Pose can seem a little daunting if you're new to yoga. However, it's a great stretch that relaxes your hips and flexors, reducing connected lower back pain.
Here's how to do Pigeon Pose. First, begin in Downward-Facing Dog pose with your feet spaced body-width apart. Next, pull your left knee out and forward and angle it to the left. This will make your left leg bend almost perpendicular to your right leg. Then sink both knees to the floor. Finally, just let your back right left stretch out behind you in a straight line.
Hold this yoga pose for 5-10 breaths, then do the other side. Repeat the flow as needed.
5. Upward Forward Bend
Our final pose helps alleviate back pain by relaxing back muscles and releasing taut hamstrings. This pose is often called a forward fold since the pose stretches upward and back to elongate the hamstrings and muscles in the back. It also loosens tight muscles in the shoulders.
Do this pose by standing straight with your feet shoulder-width apart. Breathe, bend over at the waist, and stretch to the floor. Even if you can't reach the floor, you can still do this exercise by stretching as far as possible until you feel a gentle hamstring stretch. Do this pose 5-7 times. Keep your position on your final forward bend for 5-10 breaths.
These yoga exercises are designed to unlock tight muscles and align a misaligned spine, hips, shoulders, and neck that can contribute to back pain. The good news is that you can comfortably complete these exercises at home without any equipment whenever you need some pain relief.